Enviar una aplicación con una base de datos
Si su aplicación requiere una base de datos y viene con datos incorporados, ¿cuál es la mejor manera de enviar esa aplicación? Debería:
Precrear la base de datos SQLite e incluirla en el
.apk?¿Incluir los comandos SQL con la aplicación y hacer que cree la base de datos e inserte los datos en el primer uso?
Los inconvenientes que veo son:
Posibles desajustes de versión de SQLite podrían causar problemas y actualmente no lo hago sepa dónde debe ir la base de datos y cómo acceder a ella.
Puede llevar mucho tiempo crear y rellenar la base de datos en el dispositivo.
Alguna sugerencia? Se agradecería recibir indicaciones sobre la documentación relativa a cualquier cuestión.
16 answers
Acabo de encontrar una manera de hacer esto en el blog de ReignDesign en un artículo titulado Usando su propia base de datos SQLite en aplicaciones Android. Básicamente, precreas tu base de datos, la colocas en tu directorio de activos en tu apk y, en primer lugar, usas copiar en el directorio "/data/data/YOUR_PACKAGE/databases/".
Warning: date(): Invalid date.timezone value 'Europe/Kyiv', we selected the timezone 'UTC' for now. in /var/www/agent_stack/data/www/ajaxhispano.com/template/agent.layouts/content.php on line 61
2009-03-06 19:23:44
Hay dos opciones para crear y actualizar bases de datos.
Una es crear una base de datos externamente, luego colocarla en la carpeta assets del proyecto y luego copiar toda la base de datos desde allí. Esto es mucho más rápido si la base de datos tiene muchas tablas y otros componentes. Las actualizaciones se activan cambiando el número de versión de la base de datos en res/values/strings.archivo xml. Las actualizaciones se lograrían creando una nueva base de datos externamente, reemplazando la base de datos antigua en la carpeta assets con la nueva base de datos, guardando la base de datos antigua en el almacenamiento interno bajo otro nombre, copiando la nueva base de datos de la carpeta assets en el almacenamiento interno, transfiriendo todos los datos de la base de datos antigua (que fue renombrada anteriormente) a la nueva base de datos y finalmente eliminando la base de datos antigua. Puede crear una base de datos originalmente utilizando el plugin SQLite Manager FireFox para ejecutar su sql de creación instrucción.
La otra opción es crear una base de datos internamente a partir de un archivo sql. Esto no es tan rápido, pero el retraso probablemente sería imperceptible para los usuarios si la base de datos tiene solo unas pocas tablas. Las actualizaciones se activan cambiando el número de versión de la base de datos en res/values/strings.archivo xml. Las actualizaciones se realizarían procesando un archivo sql de actualización. Los datos en la base de datos permanecerán sin cambios excepto cuando se elimine su contenedor, para ejemplo dejar caer una tabla.
El siguiente ejemplo muestra cómo usar cualquiera de los métodos.
Aquí hay un ejemplo de create_database.archivo sql. Se coloca en la carpeta assets del proyecto para el método interno o se copia en el "Execute SQL" de SQLite Manager para crear la base de datos para el método externo. (NOTA: Observa el comentario sobre la tabla requerida por Android.)
--Android requires a table named 'android_metadata' with a 'locale' column
CREATE TABLE "android_metadata" ("locale" TEXT DEFAULT 'en_US');
INSERT INTO "android_metadata" VALUES ('en_US');

CREATE TABLE "kitchen_table";
CREATE TABLE "coffee_table";
CREATE TABLE "pool_table";
CREATE TABLE "dining_room_table";
CREATE TABLE "card_table";
Aquí hay un ejemplo de update_database.archivo sql. Es para ser se coloca en la carpeta assets del proyecto para el método interno o se copia en el "Execute SQL" de SQLite Manager para crear la base de datos para el método externo. (NOTA: Tenga en cuenta que los tres tipos de comentarios SQL serán ignorados por el analizador de sql que se incluye en este ejemplo.)
--CREATE TABLE "kitchen_table";  This is one type of comment in sql.  It is ignored by parseSql.
/*
 * CREATE TABLE "coffee_table"; This is a second type of comment in sql.  It is ignored by parseSql.
 */
{
CREATE TABLE "pool_table";  This is a third type of comment in sql.  It is ignored by parseSql.
}
/* CREATE TABLE "dining_room_table"; This is a second type of comment in sql.  It is ignored by parseSql. */
{ CREATE TABLE "card_table"; This is a third type of comment in sql.  It is ignored by parseSql. }

--DROP TABLE "picnic_table"; Uncomment this if picnic table was previously created and now is being replaced.
CREATE TABLE "picnic_table" ("plates" TEXT);
INSERT INTO "picnic_table" VALUES ('paper');
Aquí hay una entrada para agregar a las cadenas/res/values/.archivo xml para el número de versión de la base de datos.
<item type="string" name="databaseVersion" format="integer">1</item>
Aquí hay una actividad que accede a la base de datos y luego lo usa. (Nota: Es posible que desee ejecutar el código de la base de datos en un subproceso separado si utiliza muchos recursos.)
package android.example;

import android.app.Activity;
import android.database.sqlite.SQLiteDatabase;
import android.os.Bundle;

/**
 * @author Danny Remington - MacroSolve
 *
 *         Activity for demonstrating how to use a sqlite database.
 */
public class Database extends Activity {
     /** Called when the activity is first created. */
     @Override
    public void onCreate(Bundle savedInstanceState) {
        super.onCreate(savedInstanceState);
        setContentView(R.layout.main);
        DatabaseHelper myDbHelper;
        SQLiteDatabase myDb = null;

        myDbHelper = new DatabaseHelper(this);
        /*
         * Database must be initialized before it can be used. This will ensure
         * that the database exists and is the current version.
         */
         myDbHelper.initializeDataBase();

         try {
            // A reference to the database can be obtained after initialization.
            myDb = myDbHelper.getWritableDatabase();
            /*
             * Place code to use database here.
             */
         } catch (Exception ex) {
            ex.printStackTrace();
         } finally {
            try {
                myDbHelper.close();
            } catch (Exception ex) {
                ex.printStackTrace();
            } finally {
                myDb.close();
            }
        }

    }
}
Aquí está la clase auxiliar de base de datos donde se crea o actualiza la base de datos si es necesario. (NOTA: Android requiere que crees una clase que extienda SQLiteOpenHelper para trabajar con una base de datos Sqlite.)
package android.example;

import java.io.FileOutputStream;
import java.io.IOException;
import java.io.InputStream;
import java.io.OutputStream;

import android.content.Context;
import android.database.sqlite.SQLiteDatabase;
import android.database.sqlite.SQLiteOpenHelper;

/**
 * @author Danny Remington - MacroSolve
 *
 *         Helper class for sqlite database.
 */
public class DatabaseHelper extends SQLiteOpenHelper {

    /*
     * The Android's default system path of the application database in internal
     * storage. The package of the application is part of the path of the
     * directory.
     */
    private static String DB_DIR = "/data/data/android.example/databases/";
    private static String DB_NAME = "database.sqlite";
    private static String DB_PATH = DB_DIR + DB_NAME;
    private static String OLD_DB_PATH = DB_DIR + "old_" + DB_NAME;

    private final Context myContext;

    private boolean createDatabase = false;
    private boolean upgradeDatabase = false;

    /**
     * Constructor Takes and keeps a reference of the passed context in order to
     * access to the application assets and resources.
     *
     * @param context
     */
    public DatabaseHelper(Context context) {
        super(context, DB_NAME, null, context.getResources().getInteger(
                R.string.databaseVersion));
        myContext = context;
        // Get the path of the database that is based on the context.
        DB_PATH = myContext.getDatabasePath(DB_NAME).getAbsolutePath();
    }

    /**
     * Upgrade the database in internal storage if it exists but is not current.
     * Create a new empty database in internal storage if it does not exist.
     */
    public void initializeDataBase() {
        /*
         * Creates or updates the database in internal storage if it is needed
         * before opening the database. In all cases opening the database copies
         * the database in internal storage to the cache.
         */
        getWritableDatabase();

        if (createDatabase) {
            /*
             * If the database is created by the copy method, then the creation
             * code needs to go here. This method consists of copying the new
             * database from assets into internal storage and then caching it.
             */
            try {
                /*
                 * Write over the empty data that was created in internal
                 * storage with the one in assets and then cache it.
                 */
                copyDataBase();
            } catch (IOException e) {
                throw new Error("Error copying database");
            }
        } else if (upgradeDatabase) {
            /*
             * If the database is upgraded by the copy and reload method, then
             * the upgrade code needs to go here. This method consists of
             * renaming the old database in internal storage, create an empty
             * new database in internal storage, copying the database from
             * assets to the new database in internal storage, caching the new
             * database from internal storage, loading the data from the old
             * database into the new database in the cache and then deleting the
             * old database from internal storage.
             */
            try {
                FileHelper.copyFile(DB_PATH, OLD_DB_PATH);
                copyDataBase();
                SQLiteDatabase old_db = SQLiteDatabase.openDatabase(OLD_DB_PATH, null, SQLiteDatabase.OPEN_READWRITE);
                SQLiteDatabase new_db = SQLiteDatabase.openDatabase(DB_PATH,null, SQLiteDatabase.OPEN_READWRITE);
                /*
                 * Add code to load data into the new database from the old
                 * database and then delete the old database from internal
                 * storage after all data has been transferred.
                 */
            } catch (IOException e) {
                throw new Error("Error copying database");
            }
        }

    }

    /**
     * Copies your database from your local assets-folder to the just created
     * empty database in the system folder, from where it can be accessed and
     * handled. This is done by transfering bytestream.
     * */
    private void copyDataBase() throws IOException {
        /*
         * Close SQLiteOpenHelper so it will commit the created empty database
         * to internal storage.
         */
        close();

        /*
         * Open the database in the assets folder as the input stream.
         */
        InputStream myInput = myContext.getAssets().open(DB_NAME);

        /*
         * Open the empty db in interal storage as the output stream.
         */
        OutputStream myOutput = new FileOutputStream(DB_PATH);

        /*
         * Copy over the empty db in internal storage with the database in the
         * assets folder.
         */
        FileHelper.copyFile(myInput, myOutput);

        /*
         * Access the copied database so SQLiteHelper will cache it and mark it
         * as created.
         */
        getWritableDatabase().close();
    }

    /*
     * This is where the creation of tables and the initial population of the
     * tables should happen, if a database is being created from scratch instead
     * of being copied from the application package assets. Copying a database
     * from the application package assets to internal storage inside this
     * method will result in a corrupted database.
     * <P>
     * NOTE: This method is normally only called when a database has not already
     * been created. When the database has been copied, then this method is
     * called the first time a reference to the database is retrieved after the
     * database is copied since the database last cached by SQLiteOpenHelper is
     * different than the database in internal storage.
     */
    @Override
    public void onCreate(SQLiteDatabase db) {
        /*
         * Signal that a new database needs to be copied. The copy process must
         * be performed after the database in the cache has been closed causing
         * it to be committed to internal storage. Otherwise the database in
         * internal storage will not have the same creation timestamp as the one
         * in the cache causing the database in internal storage to be marked as
         * corrupted.
         */
        createDatabase = true;

        /*
         * This will create by reading a sql file and executing the commands in
         * it.
         */
            // try {
            // InputStream is = myContext.getResources().getAssets().open(
            // "create_database.sql");
            //
            // String[] statements = FileHelper.parseSqlFile(is);
            //
            // for (String statement : statements) {
            // db.execSQL(statement);
            // }
            // } catch (Exception ex) {
            // ex.printStackTrace();
            // }
    }

    /**
     * Called only if version number was changed and the database has already
     * been created. Copying a database from the application package assets to
     * the internal data system inside this method will result in a corrupted
     * database in the internal data system.
     */
    @Override
    public void onUpgrade(SQLiteDatabase db, int oldVersion, int newVersion) {
        /*
         * Signal that the database needs to be upgraded for the copy method of
         * creation. The copy process must be performed after the database has
         * been opened or the database will be corrupted.
         */
        upgradeDatabase = true;

        /*
         * Code to update the database via execution of sql statements goes
         * here.
         */

        /*
         * This will upgrade by reading a sql file and executing the commands in
         * it.
         */
        // try {
        // InputStream is = myContext.getResources().getAssets().open(
        // "upgrade_database.sql");
        //
        // String[] statements = FileHelper.parseSqlFile(is);
        //
        // for (String statement : statements) {
        // db.execSQL(statement);
        // }
        // } catch (Exception ex) {
        // ex.printStackTrace();
        // }
    }

    /**
     * Called everytime the database is opened by getReadableDatabase or
     * getWritableDatabase. This is called after onCreate or onUpgrade is
     * called.
     */
    @Override
    public void onOpen(SQLiteDatabase db) {
        super.onOpen(db);
    }

    /*
     * Add your public helper methods to access and get content from the
     * database. You could return cursors by doing
     * "return myDataBase.query(....)" so it'd be easy to you to create adapters
     * for your views.
     */

}
Aquí está la clase FileHelper que contiene métodos para copiar archivos de flujo de bytes y analizar sql file.
package android.example;

import java.io.BufferedReader;
import java.io.File;
import java.io.FileInputStream;
import java.io.FileOutputStream;
import java.io.FileReader;
import java.io.IOException;
import java.io.InputStream;
import java.io.InputStreamReader;
import java.io.OutputStream;
import java.io.Reader;
import java.nio.channels.FileChannel;

/**
 * @author Danny Remington - MacroSolve
 *
 *         Helper class for common tasks using files.
 *
 */
public class FileHelper {
    /**
     * Creates the specified <i><b>toFile</b></i> that is a byte for byte a copy
     * of <i><b>fromFile</b></i>. If <i><b>toFile</b></i> already existed, then
     * it will be replaced with a copy of <i><b>fromFile</b></i>. The name and
     * path of <i><b>toFile</b></i> will be that of <i><b>toFile</b></i>. Both
     * <i><b>fromFile</b></i> and <i><b>toFile</b></i> will be closed by this
     * operation.
     *
     * @param fromFile
     *            - InputStream for the file to copy from.
     * @param toFile
     *            - InputStream for the file to copy to.
     */
    public static void copyFile(InputStream fromFile, OutputStream toFile) throws IOException {
        // transfer bytes from the inputfile to the outputfile
        byte[] buffer = new byte[1024];
        int length;

        try {
            while ((length = fromFile.read(buffer)) > 0) {
                toFile.write(buffer, 0, length);
            }
        }
        // Close the streams
        finally {
            try {
                if (toFile != null) {
                    try {
                        toFile.flush();
                    } finally {
                        toFile.close();
                    }
            }
            } finally {
                if (fromFile != null) {
                    fromFile.close();
                }
            }
        }
    }

    /**
     * Creates the specified <i><b>toFile</b></i> that is a byte for byte a copy
     * of <i><b>fromFile</b></i>. If <i><b>toFile</b></i> already existed, then
     * it will be replaced with a copy of <i><b>fromFile</b></i>. The name and
     * path of <i><b>toFile</b></i> will be that of <i><b>toFile</b></i>. Both
     * <i><b>fromFile</b></i> and <i><b>toFile</b></i> will be closed by this
     * operation.
     *
     * @param fromFile
     *            - String specifying the path of the file to copy from.
     * @param toFile
     *            - String specifying the path of the file to copy to.
     */
    public static void copyFile(String fromFile, String toFile) throws IOException {
        copyFile(new FileInputStream(fromFile), new FileOutputStream(toFile));
    }

    /**
     * Creates the specified <i><b>toFile</b></i> that is a byte for byte a copy
     * of <i><b>fromFile</b></i>. If <i><b>toFile</b></i> already existed, then
     * it will be replaced with a copy of <i><b>fromFile</b></i>. The name and
     * path of <i><b>toFile</b></i> will be that of <i><b>toFile</b></i>. Both
     * <i><b>fromFile</b></i> and <i><b>toFile</b></i> will be closed by this
     * operation.
     *
     * @param fromFile
     *            - File for the file to copy from.
     * @param toFile
     *            - File for the file to copy to.
     */
    public static void copyFile(File fromFile, File toFile) throws IOException {
        copyFile(new FileInputStream(fromFile), new FileOutputStream(toFile));
    }

    /**
     * Creates the specified <i><b>toFile</b></i> that is a byte for byte a copy
     * of <i><b>fromFile</b></i>. If <i><b>toFile</b></i> already existed, then
     * it will be replaced with a copy of <i><b>fromFile</b></i>. The name and
     * path of <i><b>toFile</b></i> will be that of <i><b>toFile</b></i>. Both
     * <i><b>fromFile</b></i> and <i><b>toFile</b></i> will be closed by this
     * operation.
     *
     * @param fromFile
     *            - FileInputStream for the file to copy from.
     * @param toFile
     *            - FileInputStream for the file to copy to.
     */
    public static void copyFile(FileInputStream fromFile, FileOutputStream toFile) throws IOException {
        FileChannel fromChannel = fromFile.getChannel();
        FileChannel toChannel = toFile.getChannel();

        try {
            fromChannel.transferTo(0, fromChannel.size(), toChannel);
        } finally {
            try {
                if (fromChannel != null) {
                    fromChannel.close();
                }
            } finally {
                if (toChannel != null) {
                    toChannel.close();
                }
            }
        }
    }

    /**
     * Parses a file containing sql statements into a String array that contains
     * only the sql statements. Comments and white spaces in the file are not
     * parsed into the String array. Note the file must not contained malformed
     * comments and all sql statements must end with a semi-colon ";" in order
     * for the file to be parsed correctly. The sql statements in the String
     * array will not end with a semi-colon ";".
     *
     * @param sqlFile
     *            - String containing the path for the file that contains sql
     *            statements.
     *
     * @return String array containing the sql statements.
     */
    public static String[] parseSqlFile(String sqlFile) throws IOException {
        return parseSqlFile(new BufferedReader(new FileReader(sqlFile)));
    }

    /**
     * Parses a file containing sql statements into a String array that contains
     * only the sql statements. Comments and white spaces in the file are not
     * parsed into the String array. Note the file must not contained malformed
     * comments and all sql statements must end with a semi-colon ";" in order
     * for the file to be parsed correctly. The sql statements in the String
     * array will not end with a semi-colon ";".
     *
     * @param sqlFile
     *            - InputStream for the file that contains sql statements.
     *
     * @return String array containing the sql statements.
     */
    public static String[] parseSqlFile(InputStream sqlFile) throws IOException {
        return parseSqlFile(new BufferedReader(new InputStreamReader(sqlFile)));
    }

    /**
     * Parses a file containing sql statements into a String array that contains
     * only the sql statements. Comments and white spaces in the file are not
     * parsed into the String array. Note the file must not contained malformed
     * comments and all sql statements must end with a semi-colon ";" in order
     * for the file to be parsed correctly. The sql statements in the String
     * array will not end with a semi-colon ";".
     *
     * @param sqlFile
     *            - Reader for the file that contains sql statements.
     *
     * @return String array containing the sql statements.
     */
    public static String[] parseSqlFile(Reader sqlFile) throws IOException {
        return parseSqlFile(new BufferedReader(sqlFile));
    }

    /**
     * Parses a file containing sql statements into a String array that contains
     * only the sql statements. Comments and white spaces in the file are not
     * parsed into the String array. Note the file must not contained malformed
     * comments and all sql statements must end with a semi-colon ";" in order
     * for the file to be parsed correctly. The sql statements in the String
     * array will not end with a semi-colon ";".
     *
     * @param sqlFile
     *            - BufferedReader for the file that contains sql statements.
     *
     * @return String array containing the sql statements.
     */
    public static String[] parseSqlFile(BufferedReader sqlFile) throws IOException {
        String line;
        StringBuilder sql = new StringBuilder();
        String multiLineComment = null;

        while ((line = sqlFile.readLine()) != null) {
            line = line.trim();

            // Check for start of multi-line comment
            if (multiLineComment == null) {
                // Check for first multi-line comment type
                if (line.startsWith("/*")) {
                    if (!line.endsWith("}")) {
                        multiLineComment = "/*";
                    }
                // Check for second multi-line comment type
                } else if (line.startsWith("{")) {
                    if (!line.endsWith("}")) {
                        multiLineComment = "{";
                }
                // Append line if line is not empty or a single line comment
                } else if (!line.startsWith("--") && !line.equals("")) {
                    sql.append(line);
                } // Check for matching end comment
            } else if (multiLineComment.equals("/*")) {
                if (line.endsWith("*/")) {
                    multiLineComment = null;
                }
            // Check for matching end comment
            } else if (multiLineComment.equals("{")) {
                if (line.endsWith("}")) {
                    multiLineComment = null;
                }
            }

        }

        sqlFile.close();

        return sql.toString().split(";");
    }

}
Warning: date(): Invalid date.timezone value 'Europe/Kyiv', we selected the timezone 'UTC' for now. in /var/www/agent_stack/data/www/ajaxhispano.com/template/agent.layouts/content.php on line 61
2011-02-02 02:45:27
La biblioteca SQLiteAssetHelper hace que esta tarea sea realmente simple.
Es fácil de agregar como una dependencia de gradle (pero un Jar también está disponible para Ant / Eclipse), y junto con la documentación se puede encontrar en:
https://github.com/jgilfelt/android-sqlite-asset-helper
Como se explica en la documentación:
-
Agrega la dependencia al archivo de compilación de gradle de tu módulo:
dependencies { compile 'com.readystatesoftware.sqliteasset:sqliteassethelper:+' } -
Copie la base de datos en el directorio assets, en un subdirectorio llamado
assets/databases. Por ejemplo:assets/databases/my_database.db(Opcionalmente, puede comprimir la base de datos en un archivo zip como
assets/databases/my_database.zip. Esto no es necesario, ya que el APK ya está comprimido como un todo.) -
Crea una clase, por ejemplo:
public class MyDatabase extends SQLiteAssetHelper {

    private static final String DATABASE_NAME = "my_database.db";
    private static final int DATABASE_VERSION = 1;

    public MyDatabase(Context context) {
        super(context, DATABASE_NAME, null, DATABASE_VERSION);
    }
}
Warning: date(): Invalid date.timezone value 'Europe/Kyiv', we selected the timezone 'UTC' for now. in /var/www/agent_stack/data/www/ajaxhispano.com/template/agent.layouts/content.php on line 61
2016-03-22 10:47:08
Supongo que la mejor y la más nueva forma hasta hoy es usar la clase SQLiteAssetHelper.
Este tutorial te guía perfectamente a través de Importar y Usar Bases de datos Externas en Android
La biblioteca Android
SQLiteAssetHelperle permite construir suSQLitebase de datos en su ordenador de escritorio, y para importar y utilizar en su Aplicación para Android. Vamos a crear una aplicación sencilla para demostrar la aplicación de esta biblioteca.Paso 1: Crear una base de datos de comillas.db usando tu SQLite favorito aplicación de base de datos (DB Browser para SQLite es una cruz portátil plataforma freeware, que se puede utilizar para crear y editar SQLite base). Cree una tabla 'cotizaciones' con una sola columna 'cotización'. Inserte algunas comillas aleatorias en la tabla 'comillas'.
Paso 2: La base de datos se puede importar al proyecto directamente como es, o como un archivo comprimido. Se recomienda el archivo comprimido, si su la base de datos es demasiado grande en tamaño. Puede crear un
ZIPcompresión o una compresiónGZ.El nombre del archivo db comprimido debe ser
quotes.db.zip, si está usando compresión ZIP oquotes.db.gz, si está usando GZ compresión.Paso 3: Crear una nueva aplicación
External Database Democon un nombre del paquetecom.javahelps.com.javahelps.externaldatabasedemo.Paso 4 : Abra el archivo
build.gradle(Module: app) y agregue lo siguiente dependencia.dependencies { compile 'com.readystatesoftware.sqliteasset:sqliteassethelper:+' }Una vez que haya guardado el archivo
build.gradlehaga clic en 'Sincronizar ahora' enlace para actualizar el proyecto. Puede sincronizar elbuild.gradle, por haciendo clic derecho en el archivobuild.gradley seleccionando la opciónSynchronize build.gradletambién.Paso 5 : Haga clic derecho en la carpeta de la aplicación y cree una nueva carpeta de activos.
Paso 6 : Cree una nueva carpeta 'bases de datos' dentro de la carpeta assets.
Paso 7 : Copie y pegue el archivo
quotes.db.zipdentro delassets/databasescarpeta.Paso 8 : Crea una nueva clase
DatabaseOpenHelperpackage com.javahelps.externaldatabasedemo; import android.content.Context; import com.readystatesoftware.sqliteasset.SQLiteAssetHelper; public class DatabaseOpenHelper extends SQLiteAssetHelper { private static final String DATABASE_NAME = "quotes.db"; private static final int DATABASE_VERSION = 1; public DatabaseOpenHelper(Context context) { super(context, DATABASE_NAME, null, DATABASE_VERSION); } } Notice that rather than extending SQLiteOpenHelper, the DatabaseOpenHelper extends SQLiteAssetHelper class.Paso 9 : Crea una nueva clase
DatabaseAccesse introduce el código como se muestra debajo. Más detalles sobre esta clase están disponibles en Advanced Android Tutorial de base de datos.package com.javahelps.externaldatabasedemo; import android.content.Context; import android.database.Cursor; import android.database.sqlite.SQLiteDatabase; import android.database.sqlite.SQLiteOpenHelper; import java.util.ArrayList; import java.util.List; public class DatabaseAccess { private SQLiteOpenHelper openHelper; private SQLiteDatabase database; private static DatabaseAccess instance; /** * Private constructor to aboid object creation from outside classes. * * @param context */ private DatabaseAccess(Context context) { this.openHelper = new DatabaseOpenHelper(context); } /** * Return a singleton instance of DatabaseAccess. * * @param context the Context * @return the instance of DabaseAccess */ public static DatabaseAccess getInstance(Context context) { if (instance == null) { instance = new DatabaseAccess(context); } return instance; } /** * Open the database connection. */ public void open() { this.database = openHelper.getWritableDatabase(); } /** * Close the database connection. */ public void close() { if (database != null) { this.database.close(); } } /** * Read all quotes from the database. * * @return a List of quotes */ public List<String> getQuotes() { List<String> list = new ArrayList<>(); Cursor cursor = database.rawQuery("SELECT * FROM quotes", null); cursor.moveToFirst(); while (!cursor.isAfterLast()) { list.add(cursor.getString(0)); cursor.moveToNext(); } cursor.close(); return list; } } In this class only the `getQuotes` method is implemented to read the data from the database. You have the full freedom to insert,Actualice y elimine cualquier fila de la base de datos como de costumbre. Para más detalles, siga este enlace Base de datos Avanzada de Android.
Todas las configuraciones relacionadas con la base de datos se han completado y ahora necesitamos crear un
ListViewpara mostrar el citar.Paso 10 : Añade un
ListViewen tuactivity_main.xml.<FrameLayout xmlns:android="http://schemas.android.com/apk/res/android" xmlns:tools="http://schemas.android.com/tools" android:layout_width="match_parent" android:layout_height="match_parent" android:paddingBottom="@dimen/activity_vertical_margin" android:paddingLeft="@dimen/activity_horizontal_margin" android:paddingRight="@dimen/activity_horizontal_margin" android:paddingTop="@dimen/activity_vertical_margin" tools:context=".MainActivity"> <ListView android:id="@+id/listView" android:layout_width="match_parent" android:layout_height="match_parent" android:layout_gravity="center" /> </FrameLayout>Paso 11 : Encuentre el objeto de
ListViewen el métodoonCreatedeMainActivityy alimente las citas que se leen formen la base de datos.package com.javahelps.externaldatabasedemo; import android.os.Bundle; import android.support.v7.app.ActionBarActivity; import android.widget.ArrayAdapter; import android.widget.ListView; import java.util.List; public class MainActivity extends ActionBarActivity { private ListView listView; @Override protected void onCreate(Bundle savedInstanceState) { super.onCreate(savedInstanceState); setContentView(R.layout.activity_main); this.listView = (ListView) findViewById(R.id.listView); DatabaseAccess databaseAccess = DatabaseAccess.getInstance(this); databaseAccess.open(); List<String> quotes = databaseAccess.getQuotes(); databaseAccess.close(); ArrayAdapter<String> adapter = new ArrayAdapter<String>(this, android.R.layout.simple_list_item_1, quotes); this.listView.setAdapter(adapter); } }Paso 12 : Guarde todos los cambios y ejecute la aplicación.
Además De este artículo se puede descargar SQLiteAssetHelper aquí
Warning: date(): Invalid date.timezone value 'Europe/Kyiv', we selected the timezone 'UTC' for now. in /var/www/agent_stack/data/www/ajaxhispano.com/template/agent.layouts/content.php on line 61
2016-01-21 08:01:07
Mi solución no utiliza ninguna biblioteca de terceros ni le obliga a llamar a métodos personalizados en la subclase SQLiteOpenHelper para inicializar la base de datos en la creación. También se encarga de las actualizaciones de la base de datos también. Todo lo que hay que hacer es subclase SQLiteOpenHelper.
Prerrequisito:
- La base de datos que desea enviar con la aplicación. Debe contener una tabla 1x1 llamada
android_metadatacon un atributolocaleque tenga el valoren_USademás de las tablas únicas de su app.
Subclase SQLiteOpenHelper:
- Subclase
SQLiteOpenHelper. - Crea un método
privatedentro de la subclaseSQLiteOpenHelper. Este método contiene la lógica para copiar el contenido de la base de datos desde el archivo de base de datos en la carpeta' assets ' a la base de datos creada en el contexto del paquete de la aplicación. - Reemplazar
onCreate,onUpgradeyonOpenmétodos deSQLiteOpenHelper.
Suficiente dicho. Aquí va la subclase SQLiteOpenHelper:
public class PlanDetailsSQLiteOpenHelper extends SQLiteOpenHelper {
    private static final String TAG = "SQLiteOpenHelper";

    private final Context context;
    private static final int DATABASE_VERSION = 1;
    private static final String DATABASE_NAME = "my_custom_db";

    private boolean createDb = false, upgradeDb = false;

    public PlanDetailsSQLiteOpenHelper(Context context) {
        super(context, DATABASE_NAME, null, DATABASE_VERSION);
        this.context = context;
    }

    /**
     * Copy packaged database from assets folder to the database created in the
     * application package context.
     *
     * @param db
     *            The target database in the application package context.
     */
    private void copyDatabaseFromAssets(SQLiteDatabase db) {
        Log.i(TAG, "copyDatabase");
        InputStream myInput = null;
        OutputStream myOutput = null;
        try {
            // Open db packaged as asset as the input stream
            myInput = context.getAssets().open("path/to/shipped/db/file");

            // Open the db in the application package context:
            myOutput = new FileOutputStream(db.getPath());

            // Transfer db file contents:
            byte[] buffer = new byte[1024];
            int length;
            while ((length = myInput.read(buffer)) > 0) {
                myOutput.write(buffer, 0, length);
            }
            myOutput.flush();

            // Set the version of the copied database to the current
            // version:
            SQLiteDatabase copiedDb = context.openOrCreateDatabase(
                DATABASE_NAME, 0, null);
            copiedDb.execSQL("PRAGMA user_version = " + DATABASE_VERSION);
            copiedDb.close();

        } catch (IOException e) {
            e.printStackTrace();
            throw new Error(TAG + " Error copying database");
        } finally {
            // Close the streams
            try {
                if (myOutput != null) {
                    myOutput.close();
                }
                if (myInput != null) {
                    myInput.close();
                }
            } catch (IOException e) {
                e.printStackTrace();
                throw new Error(TAG + " Error closing streams");
            }
        }
    }

    @Override
    public void onCreate(SQLiteDatabase db) {
        Log.i(TAG, "onCreate db");
        createDb = true;
    }

    @Override
    public void onUpgrade(SQLiteDatabase db, int oldVersion, int newVersion) {
        Log.i(TAG, "onUpgrade db");
        upgradeDb = true;
    }

    @Override
    public void onOpen(SQLiteDatabase db) {
        Log.i(TAG, "onOpen db");
        if (createDb) {// The db in the application package
            // context is being created.
            // So copy the contents from the db
            // file packaged in the assets
            // folder:
            createDb = false;
            copyDatabaseFromAssets(db);

        }
        if (upgradeDb) {// The db in the application package
            // context is being upgraded from a lower to a higher version.
            upgradeDb = false;
            // Your db upgrade logic here:
        }
    }
}
Finalmente, para obtener una base de datos conexión, simplemente llame a getReadableDatabase() o getWritableDatabase() en la subclase SQLiteOpenHelper y se encargará de crear una bd, copiando el contenido de la bd del archivo especificado en la carpeta 'assets', si la base de datos no existe.
En resumen, puede usar la subclase SQLiteOpenHelper para acceder a la base de datos enviada en la carpeta assets del mismo modo que lo haría con una base de datos que se inicializa mediante consultas SQL en el método onCreate().
Warning: date(): Invalid date.timezone value 'Europe/Kyiv', we selected the timezone 'UTC' for now. in /var/www/agent_stack/data/www/ajaxhispano.com/template/agent.layouts/content.php on line 61
2015-03-26 14:56:20
Envío de la aplicación con un archivo de base de datos, en Android Studio 3.0
Enviar la aplicación con un archivo de base de datos es una buena idea para mí. La ventaja es que no necesita hacer una inicialización compleja, que a veces cuesta mucho tiempo, si su conjunto de datos es enorme.
Paso 1: Preparar el archivo de base de datos
Tenga su archivo de base de datos listo. Puede ser una .archivo db o a .archivo sqlite. Si usa un .archivo sqlite, todo lo que necesita hacer es cambiar los nombres de las extensiones de archivo. Los pasos son los mismos.
En este ejemplo, preparé un archivo llamado testDB.db. Tiene una tabla y algunos datos de muestra en ella como este

Paso 2: Importe el archivo en su proyecto
Cree la carpeta assets si no ha tenido una. Luego copie y pegue el archivo de base de datos en esta carpeta

Paso 3: Copie el archivo en la carpeta de datos de la aplicación
Necesita copiar la base de datos archivo a la carpeta de datos de la aplicación con el fin de hacer una mayor interacción con ella. Esta es una acción de una sola vez (inicialización) para copiar el archivo de base de datos. Si llama a este código varias veces, el archivo de base de datos en la carpeta data se sobrescribirá por el de la carpeta assets. Este proceso de sobrescritura es útil cuando desea actualizar la base de datos en el futuro durante la actualización de la aplicación.
Tenga en cuenta que durante la actualización de la aplicación, este archivo de base de datos no se cambiará en la carpeta de datos de la aplicación. Solo desinstalar bórralo.
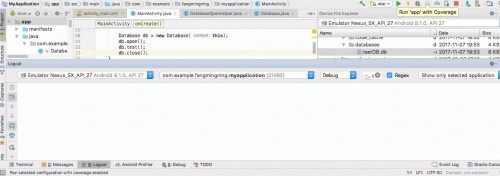
El archivo de base de datos debe copiarse en la carpeta /databases. Abra el Explorador de Archivos del Dispositivo. Introduzca data/data/<YourAppName>/ ubicación. Esta es la carpeta de datos predeterminada de la aplicación mencionada anteriormente. Y de forma predeterminada, el archivo de base de datos se colocará en otra carpeta llamada bases de datos bajo este directorio

Ahora, el proceso de copiar archivos es más o menos como lo que Java está haciendo. Utilice el siguiente código para copiar y pegar. Este es el código de iniciación. También se puede utilizar para actualizar (sobrescribiendo) el archivo de base de datos en el futuro.
//get context by calling "this" in activity or getActivity() in fragment
//call this if API level is lower than 17  String appDataPath = "/data/data/" + context.getPackageName() + "/databases/"
String appDataPath = context.getApplicationInfo().dataDir;

File dbFolder = new File(appDataPath + "/databases");//Make sure the /databases folder exists
dbFolder.mkdir();//This can be called multiple times.

File dbFilePath = new File(appDataPath + "/databases/testDB.db");

try {
    InputStream inputStream = context.getAssets().open("testDB.db");
    OutputStream outputStream = new FileOutputStream(dbFilePath);
    byte[] buffer = new byte[1024];
    int length;
    while ((length = inputStream.read(buffer))>0)
    {
        outputStream.write(buffer, 0, length);
    }
    outputStream.flush();
    outputStream.close();
    inputStream.close();
} catch (IOException e){
    //handle
}
Luego actualice la carpeta para verificar el proceso de copia

Paso 4: Crear base de datos open helper
Crea una subclase para SQLiteOpenHelper, con connect, close, path, etc. Lo nombré DatabaseOpenHelper
import android.content.Context;
import android.database.SQLException;
import android.database.sqlite.SQLiteDatabase;
import android.database.sqlite.SQLiteOpenHelper;

public class DatabaseOpenHelper extends SQLiteOpenHelper {
    public static final String DB_NAME = "testDB.db";
    public static final String DB_SUB_PATH = "/databases/" + DB_NAME;
    private static String APP_DATA_PATH = "";
    private SQLiteDatabase dataBase;
    private final Context context;

    public DatabaseOpenHelper(Context context){
        super(context, DB_NAME, null, 1);
        APP_DATA_PATH = context.getApplicationInfo().dataDir;
        this.context = context;
    }

    public boolean openDataBase() throws SQLException{
        String mPath = APP_DATA_PATH + DB_SUB_PATH;
        //Note that this method assumes that the db file is already copied in place
        dataBase = SQLiteDatabase.openDatabase(mPath, null, SQLiteDatabase.OPEN_READWRITE);
        return dataBase != null;
    }

    @Override
    public synchronized void close(){
        if(dataBase != null) {dataBase.close();}
        super.close();
    }

    @Override
    public void onCreate(SQLiteDatabase db) {
    }

    @Override
    public void onUpgrade(SQLiteDatabase db, int oldVersion, int newVersion) {
    }
}
Paso 5: Crear clase de nivel superior para interactuar con la base de datos
Esta será la clase que leerá y escribirá su archivo de base de datos. También hay una muestra consulta para imprimir el valor en la base de datos.
import android.content.Context;
import android.database.Cursor;
import android.database.SQLException;
import android.database.sqlite.SQLiteDatabase;
import android.util.Log;

public class Database {
    private final Context context;
    private SQLiteDatabase database;
    private DatabaseOpenHelper dbHelper;

    public Database(Context context){
        this.context = context;
        dbHelper = new DatabaseOpenHelper(context);
    }

    public Database open() throws SQLException
    {
        dbHelper.openDataBase();
        dbHelper.close();
        database = dbHelper.getReadableDatabase();
        return this;
    }

    public void close()
    {
        dbHelper.close();
    }

    public void test(){
        try{
            String query ="SELECT value FROM test1";
            Cursor cursor = database.rawQuery(query, null);
            if (cursor.moveToFirst()){
                do{
                    String value = cursor.getString(0);
                    Log.d("db", value);
                }while (cursor.moveToNext());
            }
            cursor.close();
        } catch (SQLException e) {
            //handle
        }
    }
}
Paso 6: Prueba de funcionamiento
Pruebe el código ejecutando las siguientes líneas de códigos.
Database db = new Database(context);
db.open();
db.test();
db.close();
Pulsa el botón de correr y anima!
Warning: date(): Invalid date.timezone value 'Europe/Kyiv', we selected the timezone 'UTC' for now. in /var/www/agent_stack/data/www/ajaxhispano.com/template/agent.layouts/content.php on line 61
2017-11-07 20:23:00
En noviembre de 2017, Google lanzó la Biblioteca Room Persistence
De la documentación:
La biblioteca de persistencia de sala proporciona una capa de abstracción sobre SQLite para permitir el acceso fluido a la base de datos mientras se aprovecha todo el poder de SQLite.
La biblioteca te ayuda a crear una caché de los datos de tu app en un dispositivo eso es ejecutar tu aplicación. Esta caché, que sirve como única aplicación fuente de verdad, permite a los usuarios ver una copia coherente de clave información dentro de su aplicación, independientemente de si los usuarios tienen un conexión a internet.
La base de datos Room tiene una devolución de llamada cuando la base de datos se crea o abre por primera vez. Puede utilizar la función crear devolución de llamada para rellenar su base de datos.
Room.databaseBuilder(context.applicationContext,
        DataDatabase::class.java, "Sample.db")
        // prepopulate the database after onCreate was called
        .addCallback(object : Callback() {
            override fun onCreate(db: SupportSQLiteDatabase) {
                super.onCreate(db)
                // moving to a new thread
                ioThread {
                    getInstance(context).dataDao()
                                        .insert(PREPOPULATE_DATA)
                }
            }
        })
        .build()
Warning: date(): Invalid date.timezone value 'Europe/Kyiv', we selected the timezone 'UTC' for now. in /var/www/agent_stack/data/www/ajaxhispano.com/template/agent.layouts/content.php on line 61
2017-11-28 17:21:34
Por lo que he visto debería estar enviando una base de datos que ya tiene la configuración de tablas y datos. Sin embargo, si lo desea (y dependiendo del tipo de aplicación que tenga) puede permitir la opción "actualizar base de datos". Luego, lo que hace es descargar la última versión de sqlite, obtener las últimas instrucciones Insert/Create de un archivo de texto alojado en línea, ejecutar las instrucciones y realizar una transferencia de datos desde la base de datos antigua a la nueva.
Warning: date(): Invalid date.timezone value 'Europe/Kyiv', we selected the timezone 'UTC' for now. in /var/www/agent_stack/data/www/ajaxhispano.com/template/agent.layouts/content.php on line 61
2009-02-04 20:14:43
Finalmente lo hice!! He utilizado este enlace ayuda para usar su propia base de datos SQLite en aplicaciones Android, pero tuve que cambiarlo un poco.
-
Si tiene muchos paquetes, debe poner el nombre del paquete maestro aquí:
private static String DB_PATH = "data/data/masterPakageName/databases"; Cambié el método que copia la base de datos de la carpeta local a la carpeta emulador! Tuvo algún problema cuando esa carpeta no existía. Así que en primer lugar, debe comprobar el camino y si no está allí, debe crea la carpeta.
En el código anterior, el método
copyDatabasenunca se llamaba cuando la base de datos no existía y el métodocheckDataBasecausaba una excepción. así que cambié el código un poco.Si su base de datos no tiene una extensión de archivo, no use el nombre del archivo con una.
Funciona bien para mí, espero que sea útil para u también
    package farhangsarasIntroduction;


import java.io.File;
import java.io.FileOutputStream;
import java.io.IOException;
import java.io.InputStream;
import java.io.OutputStream;
import java.util.ArrayList;
import java.util.HashMap;

import android.content.Context;
import android.database.Cursor;

import android.database.sqlite.SQLiteDatabase;
import android.database.sqlite.SQLiteException;
import android.database.sqlite.SQLiteOpenHelper;

import android.util.Log;


    public class DataBaseHelper extends SQLiteOpenHelper{

    //The Android's default system path of your application database.
    private static String DB_PATH = "data/data/com.example.sample/databases";

    private static String DB_NAME = "farhangsaraDb";

    private SQLiteDatabase myDataBase;

    private final Context myContext;

    /**
      * Constructor
      * Takes and keeps a reference of the passed context in order to access to the application assets and resources.
      * @param context
      */
    public DataBaseHelper(Context context) {

        super(context, DB_NAME, null, 1);
            this.myContext = context;

    }

    /**
      * Creates a empty database on the system and rewrites it with your own database.
      * */
    public void createDataBase() {

        boolean dbExist;
        try {

             dbExist = checkDataBase();


        } catch (SQLiteException e) {

            e.printStackTrace();
            throw new Error("database dose not exist");

        }

        if(dbExist){
        //do nothing - database already exist
        }else{

            try {

                copyDataBase();


            } catch (IOException e) {

                e.printStackTrace();
                throw new Error("Error copying database");

            }
    //By calling this method and empty database will be created into the default system path
    //of your application so we are gonna be able to overwrite that database with our database.
        this.getReadableDatabase();


    }

    }

    /**
      * Check if the database already exist to avoid re-copying the file each time you open the application.
      * @return true if it exists, false if it doesn't
      */
    private boolean checkDataBase(){

    SQLiteDatabase checkDB = null;

    try{
        String myPath = DB_PATH +"/"+ DB_NAME;

        checkDB = SQLiteDatabase.openDatabase(myPath, null, SQLiteDatabase.OPEN_READONLY);
    }catch(SQLiteException e){

    //database does't exist yet.
        throw new Error("database does't exist yet.");

    }

    if(checkDB != null){

    checkDB.close();

    }

    return checkDB != null ? true : false;
    }

    /**
      * Copies your database from your local assets-folder to the just created empty database in the
      * system folder, from where it can be accessed and handled.
      * This is done by transfering bytestream.
      * */
    private void copyDataBase() throws IOException{


            //copyDataBase();
            //Open your local db as the input stream
            InputStream myInput = myContext.getAssets().open(DB_NAME);

            // Path to the just created empty db
            String outFileName = DB_PATH +"/"+ DB_NAME;
            File databaseFile = new File( DB_PATH);
             // check if databases folder exists, if not create one and its subfolders
            if (!databaseFile.exists()){
                databaseFile.mkdir();
            }

            //Open the empty db as the output stream
            OutputStream myOutput = new FileOutputStream(outFileName);

            //transfer bytes from the inputfile to the outputfile
            byte[] buffer = new byte[1024];
            int length;
            while ((length = myInput.read(buffer))>0){
            myOutput.write(buffer, 0, length);
            }

            //Close the streams
            myOutput.flush();
            myOutput.close();
            myInput.close();


    }


    @Override
    public synchronized void close() {

        if(myDataBase != null)
        myDataBase.close();

        super.close();

    }

    @Override
    public void onCreate(SQLiteDatabase db) {

    }


    @Override
    public void onUpgrade(SQLiteDatabase db, int oldVersion, int newVersion) {

    }

     you to create adapters for your views.

}
Warning: date(): Invalid date.timezone value 'Europe/Kyiv', we selected the timezone 'UTC' for now. in /var/www/agent_stack/data/www/ajaxhispano.com/template/agent.layouts/content.php on line 61
2014-04-03 15:16:20
Actualmente no hay manera de precrear una base de datos SQLite para enviar con su apk. Lo mejor que puede hacer es guardar el SQL apropiado como un recurso y ejecutarlo desde su aplicación. Sí, esto conduce a la duplicación de datos (la misma información existe como un resrouce y como una base de datos), pero no hay otra manera en este momento. El único factor atenuante es que el archivo apk está comprimido. Mi experiencia es 908KB compresas a menos de 268KB.
El hilo de abajo tiene la mejor discusión / solución I han encontrado con buen código de muestra.
Http://groups.google.com/group/android-developers/msg/9f455ae93a1cf152
Almacené mi instrucción CREATE como un recurso de cadena para ser leído con Contexto.getString () y lo ejecutó con SQLiteDatabse.execSQL().
Almacené los datos de mis insertos en res/raw/inserts.sql (Creé el archivo sql, más de 7000 líneas). Usando la técnica del enlace anterior ingresé en un bucle, leí el archivo línea por línea y concactené los datos en " INSERTAR EN tbl VALUE " e hizo otra base de datos SQLiteDatabase.execSQL(). No tiene sentido guardar 7000 "INSERT INTO tbl VALUE" s cuando solo se pueden concactenar.
Se tarda unos veinte segundos en el emulador, no sé cuánto tiempo tomaría esto en un teléfono real, pero solo sucede una vez, cuando el usuario inicia la aplicación por primera vez.
Warning: date(): Invalid date.timezone value 'Europe/Kyiv', we selected the timezone 'UTC' for now. in /var/www/agent_stack/data/www/ajaxhispano.com/template/agent.layouts/content.php on line 61
2009-02-04 23:32:28
Enviar la base de datos dentro del apk y luego copiarla a /data/data/... duplicará el tamaño de la base de datos (1 en apk, 1 en data/data/...), y aumentará el tamaño del apk (por supuesto). Por lo tanto, su base de datos no debe ser demasiado grande.
Warning: date(): Invalid date.timezone value 'Europe/Kyiv', we selected the timezone 'UTC' for now. in /var/www/agent_stack/data/www/ajaxhispano.com/template/agent.layouts/content.php on line 61
2014-06-30 15:43:03
Android ya proporciona un enfoque de gestión de bases de datos compatible con las versiones. Este enfoque se ha aprovechado en el marco BARACUS para aplicaciones Android.
Además, le permite ejecutar copias de seguridad en caliente y recuperación en caliente del SQLite.
No estoy 100% seguro, pero una recuperación caliente para un dispositivo específico puede permitirle enviar una base de datos preparada en su aplicación. Pero no estoy seguro sobre el formato binario de la base de datos que podría ser específico para ciertos dispositivos, proveedores o generaciones de dispositivos.
Dado que el material es Apache License 2, siéntase libre de reutilizar cualquier parte del código, que se puede encontrar en github
EDITAR:
Si solo desea enviar datos, puede considerar crear instancias y persistir POJOs en el primer inicio de las aplicaciones. BARACUS tiene un soporte integrado para esto (Almacén de valores de clave integrado para información de configuración, por ejemplo, "APP_FIRST_RUN" más un gancho de arranque después del contexto para ejecutar operaciones posteriores al lanzamiento en el contexto). Esto le permite tener datos estrechamente acoplados enviados con su aplicación; en la mayoría de los casos, esto se ajusta a mis casos de uso.
Warning: date(): Invalid date.timezone value 'Europe/Kyiv', we selected the timezone 'UTC' for now. in /var/www/agent_stack/data/www/ajaxhispano.com/template/agent.layouts/content.php on line 61
2014-11-24 12:05:39
Si los datos requeridos no son demasiado grandes (límites que no sé, dependerían de muchas cosas), también puede descargar los datos (en XML, JSON, lo que sea) desde un sitio web/aplicación web. Después de recibir, ejecute las instrucciones SQL utilizando los datos recibidos creando sus tablas e insertando los datos.
Si su aplicación móvil contiene muchos datos, puede ser más fácil actualizar los datos en las aplicaciones instaladas con datos o cambios más precisos.
Warning: date(): Invalid date.timezone value 'Europe/Kyiv', we selected the timezone 'UTC' for now. in /var/www/agent_stack/data/www/ajaxhispano.com/template/agent.layouts/content.php on line 61
2015-08-27 17:19:25
Escribí una biblioteca para simplificar este proceso.
dataBase = new DataBase.Builder(context, "myDb").
//        setAssetsPath(). // default "databases"
//        setDatabaseErrorHandler().
//        setCursorFactory().
//        setUpgradeCallback()
//        setVersion(). // default 1
build();
Creará una base de datos a partir del archivo assets/databases/myDb.db.
Además obtendrá todas esas funcionalidades:
- Cargar la base de datos desde el archivo
- Acceso sincronizado a la base de datos
- Usando sqlite-android por requerimiento, distribución específica de Android de las últimas versiones de SQLite.
Clónalo de github.
Warning: date(): Invalid date.timezone value 'Europe/Kyiv', we selected the timezone 'UTC' for now. in /var/www/agent_stack/data/www/ajaxhispano.com/template/agent.layouts/content.php on line 61
2016-07-10 05:41:59
Estoy usando ORlite y el código inferior funcionó para mí
public class DatabaseProvider extends OrmLiteSqliteOpenHelper {
    private static final String DatabaseName = "DatabaseName";
    private static final int DatabaseVersion = 1;
    private final Context ProvidedContext;

    public DatabaseProvider(Context context) {
        super(context, DatabaseName, null, DatabaseVersion);
        this.ProvidedContext= context;
        SharedPreferences preferences = PreferenceManager.getDefaultSharedPreferences(context);
        boolean databaseCopied = preferences.getBoolean("DatabaseCopied", false);
        if (databaseCopied) {
            //Do Nothing
        } else {
            CopyDatabase();
            SharedPreferences.Editor editor = preferences.edit();
            editor.putBoolean("DatabaseCopied", true);
            editor.commit();
        }
    }

    private String DatabasePath() {
        return "/data/data/" + ProvidedContext.getPackageName() + "/databases/";
    }

    private void CopyDatabase() {
        try {
            CopyDatabaseInternal();
        } catch (IOException e) {
            e.printStackTrace();
        }
    }

    private File ExtractAssetsZip(String zipFileName) {
        InputStream inputStream;
        ZipInputStream zipInputStream;
        File tempFolder;
        do {
            tempFolder = null;
            tempFolder = new File(ProvidedContext.getCacheDir() + "/extracted-" + System.currentTimeMillis() + "/");
        } while (tempFolder.exists());

        tempFolder.mkdirs();

        try {
            String filename;
            inputStream = ProvidedContext.getAssets().open(zipFileName);
            zipInputStream = new ZipInputStream(new BufferedInputStream(inputStream));
            ZipEntry zipEntry;
            byte[] buffer = new byte[1024];
            int count;

            while ((zipEntry = zipInputStream.getNextEntry()) != null) {
                filename = zipEntry.getName();
                if (zipEntry.isDirectory()) {
                    File fmd = new File(tempFolder.getAbsolutePath() + "/" + filename);
                    fmd.mkdirs();
                    continue;
                }

                FileOutputStream fileOutputStream = new FileOutputStream(tempFolder.getAbsolutePath() + "/" + filename);
                while ((count = zipInputStream.read(buffer)) != -1) {
                    fileOutputStream.write(buffer, 0, count);
                }

                fileOutputStream.close();
                zipInputStream.closeEntry();
            }

            zipInputStream.close();
        } catch (IOException e) {
            e.printStackTrace();
            return null;
        }

        return tempFolder;
    }

    private void CopyDatabaseInternal() throws IOException {

        File extractedPath = ExtractAssetsZip(DatabaseName + ".zip");
        String databaseFile = "";
        for (File innerFile : extractedPath.listFiles()) {
            databaseFile = innerFile.getAbsolutePath();
            break;
        }
        if (databaseFile == null || databaseFile.length() ==0 )
            throw new RuntimeException("databaseFile is empty");

        InputStream inputStream = new FileInputStream(databaseFile);

        String outFileName = DatabasePath() + DatabaseName;

        File destinationPath = new File(DatabasePath());
        if (!destinationPath.exists())
            destinationPath.mkdirs();

        File destinationFile = new File(outFileName);
        if (!destinationFile.exists())
            destinationFile.createNewFile();

        OutputStream myOutput = new FileOutputStream(outFileName);

        byte[] buffer = new byte[1024];
        int length;
        while ((length = inputStream.read(buffer)) > 0) {
            myOutput.write(buffer, 0, length);
        }

        myOutput.flush();
        myOutput.close();
        inputStream.close();
    }

    @Override
    public void onCreate(SQLiteDatabase sqLiteDatabase, ConnectionSource connectionSource) {
    }

    @Override
    public void onUpgrade(SQLiteDatabase sqLiteDatabase, ConnectionSource connectionSource, int fromVersion, int toVersion) {

    }
}
Tenga en cuenta que el código extrae el archivo de base de datos de un archivo zip en assets
Warning: date(): Invalid date.timezone value 'Europe/Kyiv', we selected the timezone 'UTC' for now. in /var/www/agent_stack/data/www/ajaxhispano.com/template/agent.layouts/content.php on line 61
2017-07-12 06:27:28
Modifiqué la clase y las respuestas a la pregunta y escribí una clase que permite actualizar la base de datos a través de DB_VERSION.
public class DatabaseHelper extends SQLiteOpenHelper {
    private static String DB_NAME = "info.db";
    private static String DB_PATH = "";
    private static final int DB_VERSION = 1;

    private SQLiteDatabase mDataBase;
    private final Context mContext;
    private boolean mNeedUpdate = false;

    public DatabaseHelper(Context context) {
        super(context, DB_NAME, null, DB_VERSION);
        if (android.os.Build.VERSION.SDK_INT >= 17)
            DB_PATH = context.getApplicationInfo().dataDir + "/databases/";
        else
            DB_PATH = "/data/data/" + context.getPackageName() + "/databases/";
        this.mContext = context;

        copyDataBase();

        this.getReadableDatabase();
    }

    public void updateDataBase() throws IOException {
        if (mNeedUpdate) {
            File dbFile = new File(DB_PATH + DB_NAME);
            if (dbFile.exists())
                dbFile.delete();

            copyDataBase();

            mNeedUpdate = false;
        }
    }

    private boolean checkDataBase() {
        File dbFile = new File(DB_PATH + DB_NAME);
        return dbFile.exists();
    }

    private void copyDataBase() {
        if (!checkDataBase()) {
            this.getReadableDatabase();
            this.close();
            try {
                copyDBFile();
            } catch (IOException mIOException) {
                throw new Error("ErrorCopyingDataBase");
            }
        }
    }

    private void copyDBFile() throws IOException {
        InputStream mInput = mContext.getAssets().open(DB_NAME);
        //InputStream mInput = mContext.getResources().openRawResource(R.raw.info);
        OutputStream mOutput = new FileOutputStream(DB_PATH + DB_NAME);
        byte[] mBuffer = new byte[1024];
        int mLength;
        while ((mLength = mInput.read(mBuffer)) > 0)
            mOutput.write(mBuffer, 0, mLength);
        mOutput.flush();
        mOutput.close();
        mInput.close();
    }

    public boolean openDataBase() throws SQLException {
        mDataBase = SQLiteDatabase.openDatabase(DB_PATH + DB_NAME, null, SQLiteDatabase.CREATE_IF_NECESSARY);
        return mDataBase != null;
    }

    @Override
    public synchronized void close() {
        if (mDataBase != null)
            mDataBase.close();
        super.close();
    }

    @Override
    public void onCreate(SQLiteDatabase db) {

    }

    @Override
    public void onUpgrade(SQLiteDatabase db, int oldVersion, int newVersion) {
        if (newVersion > oldVersion)
            mNeedUpdate = true;
    }
}
Usando una clase.
En la clase activity, declare variables.
private DatabaseHelper mDBHelper;
private SQLiteDatabase mDb;
En el método onCreate, escriba el siguiente código.
mDBHelper = new DatabaseHelper(this);

try {
    mDBHelper.updateDataBase();
} catch (IOException mIOException) {
    throw new Error("UnableToUpdateDatabase");
}

try {
    mDb = mDBHelper.getWritableDatabase();
} catch (SQLException mSQLException) {
    throw mSQLException;
}
Si agrega un archivo de base de datos a la carpeta res/raw, use la siguiente modificación de la clase.
public class DatabaseHelper extends SQLiteOpenHelper {
    private static String DB_NAME = "info.db";
    private static String DB_PATH = "";
    private static final int DB_VERSION = 1;

    private SQLiteDatabase mDataBase;
    private final Context mContext;
    private boolean mNeedUpdate = false;

    public DatabaseHelper(Context context) {
        super(context, DB_NAME, null, DB_VERSION);
        if (android.os.Build.VERSION.SDK_INT >= 17)
            DB_PATH = context.getApplicationInfo().dataDir + "/databases/";
        else
            DB_PATH = "/data/data/" + context.getPackageName() + "/databases/";
        this.mContext = context;

        copyDataBase();

        this.getReadableDatabase();
    }

    public void updateDataBase() throws IOException {
        if (mNeedUpdate) {
            File dbFile = new File(DB_PATH + DB_NAME);
            if (dbFile.exists())
                dbFile.delete();

            copyDataBase();

            mNeedUpdate = false;
        }
    }

    private boolean checkDataBase() {
        File dbFile = new File(DB_PATH + DB_NAME);
        return dbFile.exists();
    }

    private void copyDataBase() {
        if (!checkDataBase()) {
            this.getReadableDatabase();
            this.close();
            try {
                copyDBFile();
            } catch (IOException mIOException) {
                throw new Error("ErrorCopyingDataBase");
            }
        }
    }

    private void copyDBFile() throws IOException {
        //InputStream mInput = mContext.getAssets().open(DB_NAME);
        InputStream mInput = mContext.getResources().openRawResource(R.raw.info);
        OutputStream mOutput = new FileOutputStream(DB_PATH + DB_NAME);
        byte[] mBuffer = new byte[1024];
        int mLength;
        while ((mLength = mInput.read(mBuffer)) > 0)
            mOutput.write(mBuffer, 0, mLength);
        mOutput.flush();
        mOutput.close();
        mInput.close();
    }

    public boolean openDataBase() throws SQLException {
        mDataBase = SQLiteDatabase.openDatabase(DB_PATH + DB_NAME, null, SQLiteDatabase.CREATE_IF_NECESSARY);
        return mDataBase != null;
    }

    @Override
    public synchronized void close() {
        if (mDataBase != null)
            mDataBase.close();
        super.close();
    }

    @Override
    public void onCreate(SQLiteDatabase db) {

    }

    @Override
    public void onUpgrade(SQLiteDatabase db, int oldVersion, int newVersion) {
        if (newVersion > oldVersion)
            mNeedUpdate = true;
    }
}
Warning: date(): Invalid date.timezone value 'Europe/Kyiv', we selected the timezone 'UTC' for now. in /var/www/agent_stack/data/www/ajaxhispano.com/template/agent.layouts/content.php on line 61
2018-08-07 15:06:57